Previous Thread
Next Thread
Print Thread
Rate Thread
Page 88 of 95 1 2 86 87 88 89 90 94 95
Re: Maybe I should start a v4.0 build thread somewhere
Gr8_White_North #417898 03/19/16 06:06 PM
Joined: Sep 2004
Posts: 5,422
axiomite
OP Offline
axiomite
Joined: Sep 2004
Posts: 5,422
Originally Posted By Socketman
Nick , I took off those brackets on my QS 8's the thing I missed was the little nuts on the inside and I broke one of the screws off. Mine were double nutted and the wires from the crosser were connected.

Yeah, with the tweeters (and woofers) removed, they are easy enough to get to. I am actually tempted to not use the T bracket at all because I want to ceiling mount these anyway, and I think that the T bracket will just be in the way, plus it isn't secure enough anyway and I need to use a different mount. However I don't want to permanently attach the speaker wire making it difficult to ever take these down in the future (if we were to move).

I am thinking about replacing the T brackets with small wire "pig tails" and putting connectors on them like these:


If I do it right, I won't be damaging the original speaker box design and could re-attach the T brackets down the road if I ever needed to.


Farewell - June 4, 2020
Re: Maybe I should start a v4.0 build thread somewhere
MMM #417909 03/19/16 08:05 PM
Joined: Sep 2004
Posts: 5,422
axiomite
OP Offline
axiomite
Joined: Sep 2004
Posts: 5,422
Originally Posted By oakvillematt
HVLP is rather simple if you get the consistency of the paint right and spray at the right speed and distance.. OK.. it takes some practice.

1. the HVLP came with what looks like a small cup with a hole in the bottom. (Hope you didn't throw it out.) Use that with a stop watch to get the right consistency for your paint. It is really the only way to get it right.

2. if when spraying you can see your finish pooling and blowing around the surface, then you are way too close.

3. if you are getting a speckle or orange peel like coverage on the surface, then you are spraying too fast and too far away.

take some more photo's of the process. this is very interesting,


So I was looking at how to thin the paint. It is the same latex that we have on our ceiling. A flat paint called "Fudge Truffle". Anyway, it says on the can and online to thin just with water. 1/2 cup of water per gallon. Well, I have a 28.5 oz size that I bought recently to do some touch up, so I had to do some math since that isn't a pint or quart or anything.

Looks like it is .22 of a gallon, or 3.54 cups. So very odd amounts to try to do a water conversion.

However, if I just take 2 cups of the paint, then I just need .0625 of a cup (or 1/16 cup, or 1 Tablespoon) of water.

Doesn't seem like much water, but we will see.

There was no cup included to time the thickness of the paint. It just says that if it flows easily through the included paint strainer, that it should be good.

I would have thought that it would have at least come with a paint viscosity stick or something.


So anyway, I've got my quick and dirty hangers ready for hanging the speakers while painting, and the spray gun is clean and ready to go, but I have more on my "honey do" list before we have a surprise birthday party for someone tonight. I feel like the only time that I am not doing other things and can focus on my projects is in the middle of the night. I hope the neighbors don't get annoyed with my compressor running tonight while I spray. LOL

I better get a heater going in the garage soon too in order to get the temps up a little bit. Otherwise it is going to take forever to dry.


Farewell - June 4, 2020
Re: Maybe I should start a v4.0 build thread somewhere
nickbuol #417925 03/20/16 12:59 AM
Joined: May 2014
Posts: 1,170
Likes: 6
M
MMM Offline
connoisseur
Offline
connoisseur
M
Joined: May 2014
Posts: 1,170
Likes: 6
I have heard bad things with trying to thin out latex paint with water to get it to work with a decent HVLP. To get the right constancy I am told that you need to use floetrol

As you atomize the latex with water it breaks apart and you get globs of paint rather than a mist. I have never tried to do latex. What size needle do you have in your gun? I have a .75mm, 1mm and a 1.5mm. but I have again heard from some that trying with less than a 2mm can get funky results unless you can really thin out the latex.

what HLVP do you have?

Last edited by oakvillematt; 03/20/16 12:59 AM.

Anthem: AVM60, Fosi DAC-Q5
Axiom: ADA1500, LFR1100 Actiive, QS8, EP500, M3, M3comp, M5
Re: Maybe I should start a v4.0 build thread somewhere
nickbuol #417926 03/20/16 01:14 AM
Joined: Sep 2004
Posts: 5,422
axiomite
OP Offline
axiomite
Joined: Sep 2004
Posts: 5,422
I forgot about Floetrol. I should have some at home from the last time, but what I recall is that you still need to thin latex with water, as Floetrol isn't a thinner...

oh, and I just have $100 "Husky" branded sprayer from Home Depot or Lowe's or something.


Farewell - June 4, 2020
Re: Maybe I should start a v4.0 build thread somewhere
nickbuol #417935 03/20/16 03:39 AM
Joined: Jul 2009
Posts: 2,281
connoisseur
Offline
connoisseur
Joined: Jul 2009
Posts: 2,281
be sure to shake the gun lots while spraying, looking forward to your results . How is the humidity there right now, the drier and warmer the better and lots of thin light coats.

Richard


DOG is GOD spelled backwards.
What others think of me is none of my business.
M80 V3 MY GLOSS Cherry
Re: Maybe I should start a v4.0 build thread somewhere
nickbuol #417936 03/20/16 03:59 AM
Joined: Sep 2004
Posts: 5,422
axiomite
OP Offline
axiomite
Joined: Sep 2004
Posts: 5,422
Cool. Still working on things for my wife. smile

I've had 3 heaters running just to warm it up out there, and it is pretty arid, so that should help. Should be right at about 70F when I finally get around to shooting. It is already 11pm, but hopefully before midnight I will be going to town with the paint.


Farewell - June 4, 2020
Re: Maybe I should start a v4.0 build thread somewhere
nickbuol #417937 03/20/16 04:01 AM
Joined: Jul 2009
Posts: 2,281
connoisseur
Offline
connoisseur
Joined: Jul 2009
Posts: 2,281
I am 2 hours behind you so your working in the future smile Sounds like you have it all worked out , things should go fine.


DOG is GOD spelled backwards.
What others think of me is none of my business.
M80 V3 MY GLOSS Cherry
Re: Maybe I should start a v4.0 build thread somewhere
nickbuol #417939 03/20/16 04:47 AM
Joined: Sep 2004
Posts: 5,422
axiomite
OP Offline
axiomite
Joined: Sep 2004
Posts: 5,422
Well, it is now 11:45 and I still need to take the rear brackets off of 3 of the speakers, so a quick 320grit sand of those areas, wipe them down with a tack cloth, and hang them so that I can get started on the paint.

My wife has me working on some Photoshop stuff for a bridal shower out of town tomorrow for my oldest....


Farewell - June 4, 2020
Re: Maybe I should start a v4.0 build thread somewhere
nickbuol #417944 03/20/16 07:34 AM
Joined: Sep 2004
Posts: 5,422
axiomite
OP Offline
axiomite
Joined: Sep 2004
Posts: 5,422
Well, it took even longer than anticipated to get things done for tonight. It is 2:05am as I am beginning to type this, but I have the spray gun cleaned, and my mess tidied up for the night. The paint can says to wait at least 4 hours before recoating, so it will be after I wake up before I get another coat on there.

So here is a run down (with some fresh pictures:
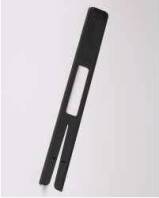
First up was getting the rear brackets off (yeah, I ignored the note from Axiom).


The top bolt comes off with the same allen wrench that the tweeter and woofer use.

The bottom bolt also uses the same allen wrench on the outside, but you must remove the nuts on the inside that hold the wires that go from the bolt to the crossover on the inside of the speaker. These nuts are just a bit wider than the tweeter opening, so I used a ratchet to loosen them, and then a small (mini) breaker bar just to basically give me a grip on the socket. Pretty easy, but again, must be done.
The red circles mark where the nuts and the wires connected to the bottom bolt when looking at the inside of the speaker cabinet.


I quickly sanded around the holes in the back as there was a bit of "something" there from the bracket.

Then I stuffed the inside with crumpled up newspaper, and went around the speaker openings with a variety of tape.

I tried blue painters first, and it was fine for the woofer opening, but didn't want to curve enough around the tweeter one. Next I tried "Frog Tape" and it was terrible. After about 2 inches, I pulled it up and moved on. Then I tried regular taupe colored masking tape that was a little narrower and it worked ok. Not as good as the blue on the woofer, but better than the blue on the tweeter. Then I tried green painters tape and BINGO. That worked the best for making the curves and sticking pretty well.

We will see how they handle paint as I wasn't going to go back and redo the others, but I did go over the tweeter area from the blue tape speaker.

Here is a speaker stuffed and taped.


And here is the brand of the green tape.


Next, I prepped the garage with drop cloths, and my "hangers." I moved the heaters around a little bit, and filled up the compressor. I connected the HVLP gun and tweaked the air flow to be around the 40 psi max just so that I knew where the top end was and could turn it down if need be.

Then I was almost ready to hang the speakers. Since I had crumpled up newspaper, the cabinets had "newspaper fingerprints" on them. I planned to clean down the outer surface anyway and wipe it with tack cloth, so that is what I did. Right, wrong, or indifferent, I just used Windex sprayed on to a paper towel. This is fairly high in alcohol it seems, and dries quickly. A few quick scrubs and the cabinets were clean again. Oh, I should mention that I washed my hands a LOT from right before this until I was done. I didn't want anything contaminating the surface.

So they were cleaned, dried, and wiped down with the tack cloth and then put on the "hangers."


After setting them up, I went inside and got the paint ready. I mixed 2 cups of paint and 1 tablespoon of water. After they were nicely mixed, I added 2 tablespoons of Floetrol and mixed it in. I had some left from my previous project, but it was all separated and had gotten a bit chunky, so I had to buy some new. I used so little compared to what comes in the $6.50 jug. LOL

After mixing that up, it still didn't seem thin enough, so I added a 1/2 tablespoon of water, mixed, and said "Heck, I don't know. Looks good to me I guess."

I poured it into the cup of the sprayer (through a filter funnel of course), and headed outside.

I grabbed some cardboard and fired things off. I had it set to pretty much maximum air and maximum paint in a fan pattern. The problem was that I had to get somewhat close to get good coverage, although I know that it will take a couple of coats to be nice and even. I probably needed to dial in the settings a bit for either a less wide pattern, or maybe less air, but it was working so I just went with it.

I sprayed the bottoms first. I don't know why, I just did. Then I went to the top, then the back, followed by each side, and then the front face. Repeat, repeat, and repeat.
No runs. No splatter. Fairly even coat.


These will hang here overnight, but I just checked on them since it has been about an hour since I finished spraying, and they seem dry already. There is a slight texture to them when you touch them, but definitely smaller than orange peel, and I just don't know if that is because this is flat laytex and thus naturally feels a bit "scratchy."

I will let them hang, like I said, until morning, and then probably given them a super light sand with the 320 grit to see if that does anything positive. I will also mess around with the sprayer settings a bit more as I got nervous when testing tonight thinking that I was going through a lot of paint and I only had a little over 3.5 cups to use (2 cups were in the sprayer). After I was done I had about 1.8 cups left in the sprayer. I completely forgot how much coverage you get with so little actual paint when spraying. I have PLENTY left to use tomorrow and to tune it in a bit.

So anyway, it is now 2:35am and I am heading to bed. Oh, and yes, I saw that the one greenish drop cloth that I put up on the garage door was falling down and I had the heater under it. I have since taken down the drop cloth.

Oh, last thing... I love how little overspray there is with HVLP. I am sure that there is some underneath the speakers, but I was worried about it being all over the place, and it really wasn't. The paint that you see on the drop cloth is from other projects, not this one.

Until tomorrow....


Farewell - June 4, 2020
Re: Maybe I should start a v4.0 build thread somewhere
nickbuol #417947 03/20/16 11:03 AM
Joined: May 2014
Posts: 1,170
Likes: 6
M
MMM Offline
connoisseur
Offline
connoisseur
M
Joined: May 2014
Posts: 1,170
Likes: 6
Quote:
There is a slight texture to them when you touch them, but definitely smaller than orange peel, and I just don't know if that is because this is flat laytex and thus naturally feels a bit "scratchy."


Slow down the movement on your spray pass. That will help deposit a bit more paint so that the micro droplets have a chance to bond to each other. it feels wrong but will give you the results that you are looking for.

Reality is with HVLP spaying that you are putting on so little paint that it will have tack dried within seconds of you painting, and cured within 1/2 an hour enough that your can recover with a second coat. As you are sanding, waiting that extra time is probably a good idea as it gives extra time for it to bond and the next coat will have a similar molecular structure to bond to.

Looks good from what you have posted.


Anthem: AVM60, Fosi DAC-Q5
Axiom: ADA1500, LFR1100 Actiive, QS8, EP500, M3, M3comp, M5
Page 88 of 95 1 2 86 87 88 89 90 94 95

Moderated by  alan, Amie, Andrew, axiomadmin, Brent, Debbie, Ian, Jc 

Link Copied to Clipboard

Need Help Graphic

Forum Statistics
Forums16
Topics24,943
Posts442,465
Members15,617
Most Online2,082
Jan 22nd, 2020
Top Posters
Ken.C 18,044
pmbuko 16,441
SirQuack 13,840
CV 12,077
MarkSJohnson 11,458
Who's Online Now
0 members (), 236 guests, and 6 robots.
Key: Admin, Global Mod, Mod
Newsletter Signup
Powered by UBB.threads™ PHP Forum Software 7.7.4