Sounds like a great project.
Yeah, I'll be watching this one!
Cool! Are you going for a fancy high gloss look? I always thought Axioms had magnetic grilles.
So are you veneering them yourself? How are you planning on sticking them on? contact cement or are you vacuum bagging them with some type of glue?
I will be very curious from both a forum member but also as a woodworker.
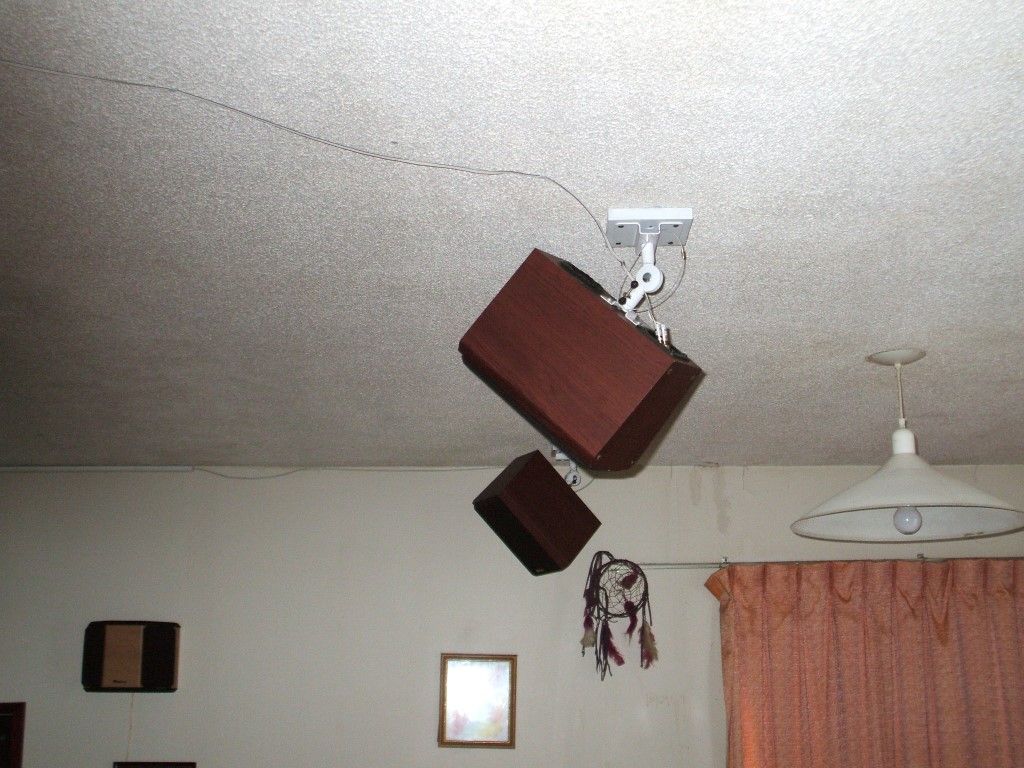
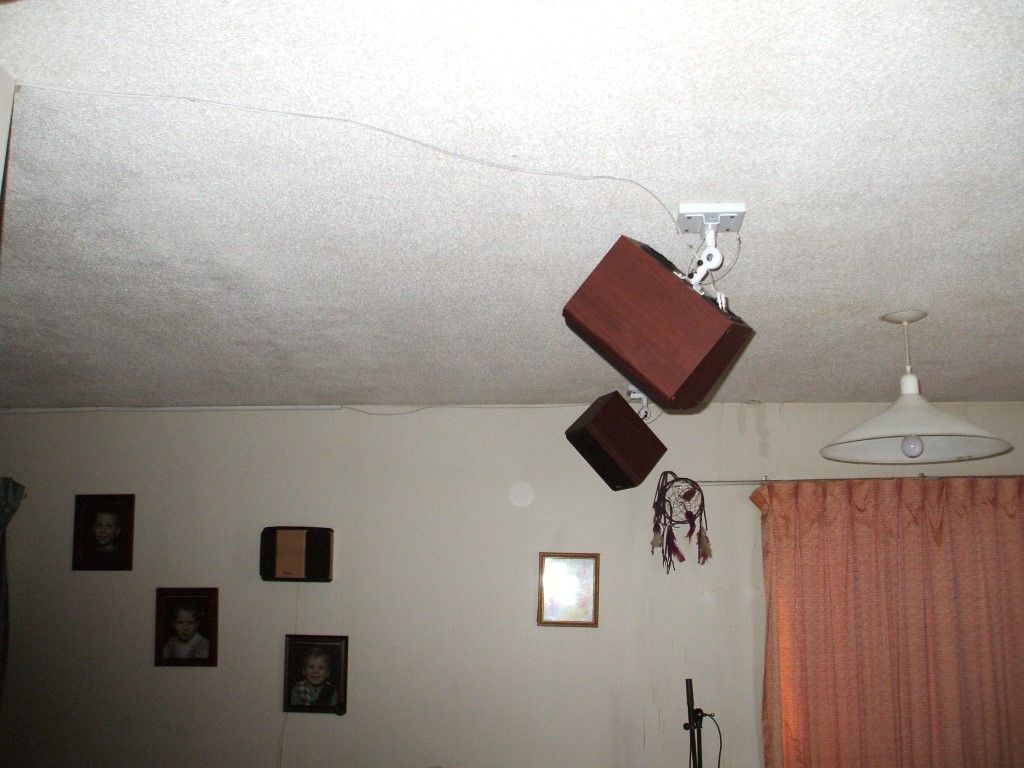
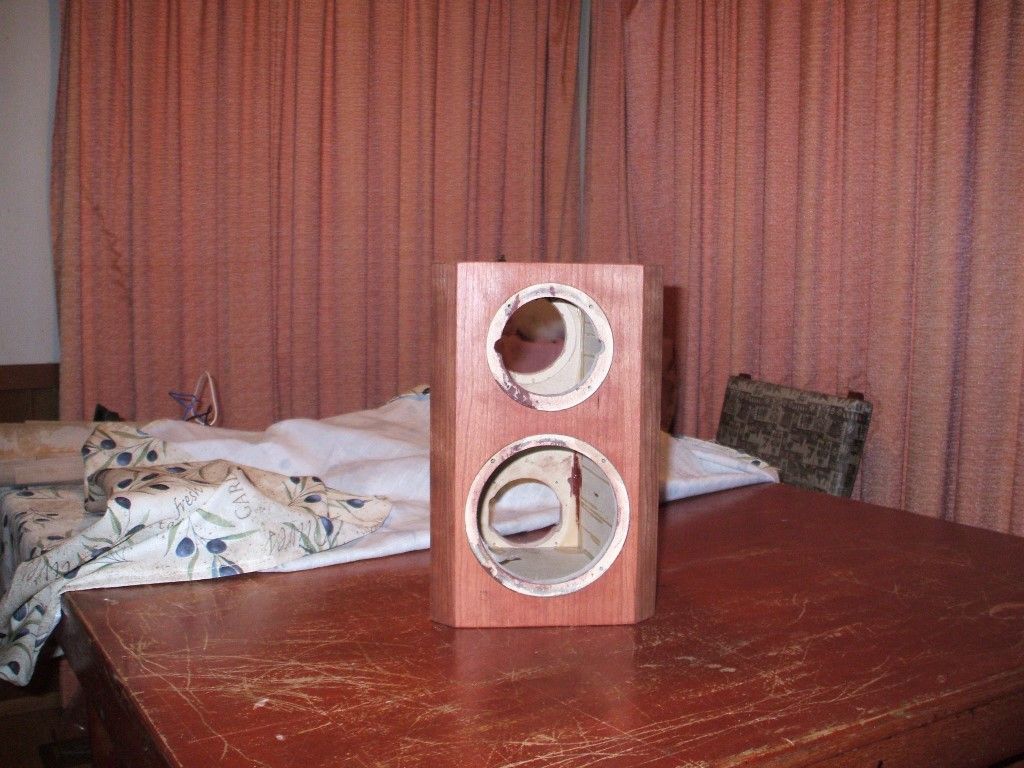
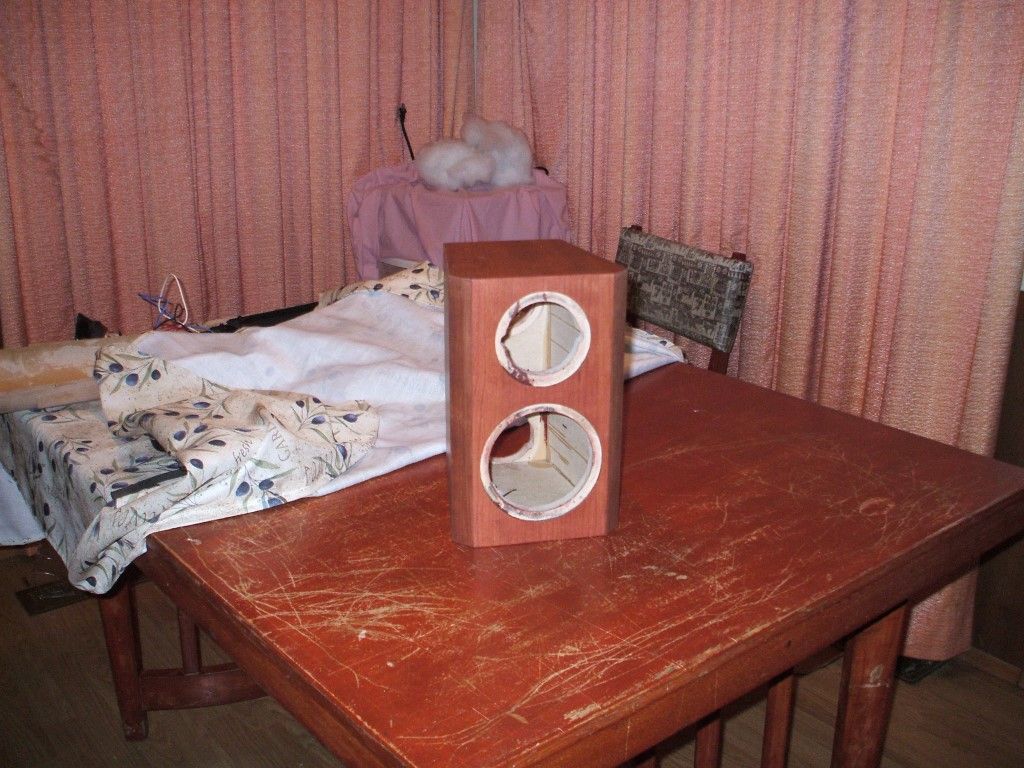
What got this all started again was I built these
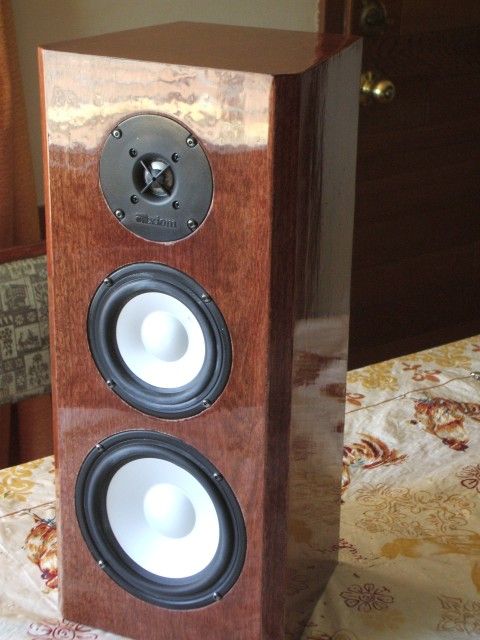
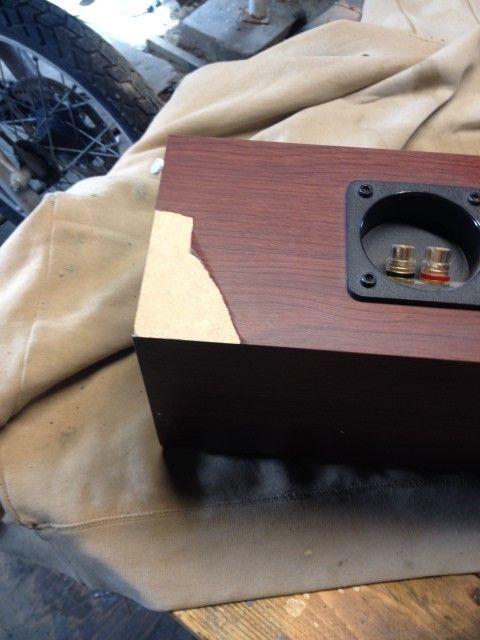
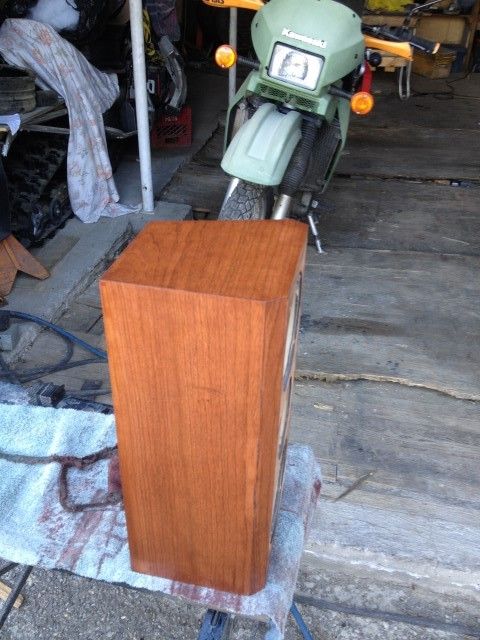
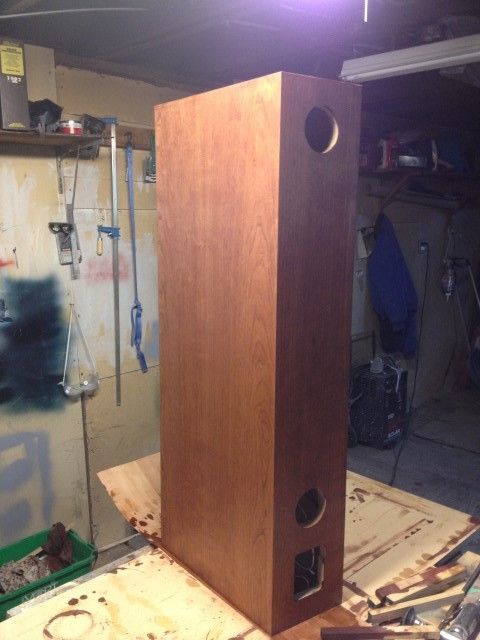
and they are in my bedroom and I sit and look at them all the time and I see the VP100 there with vinyl and I finally decided enough is enough LOL. I used 10 mil backer but have done more research and will be using 22mil backer which is recommended for applications where contact cement is used. The stain can weaken the glue apparently. The 22mil has a thin layer of phenolic between 2 sheets of paper and it also prevents imperfections from bleeding through. I did the 3 ways a couple years ago and so far no problems so I think contact cement is more than adequate. I am going to hone my skills on these before attempting the M80's. As for the grills, only V4 has magnets to hold them on. The VP100 is V2 and my M80,s are V3.
I have decided to paint the front of the speakers black and veneer the rest of it. The veneer will get 2 coats of high gloss varathane, then it will get 3 or 4 coats of automotive clear which stays glossy and is low maintenance.
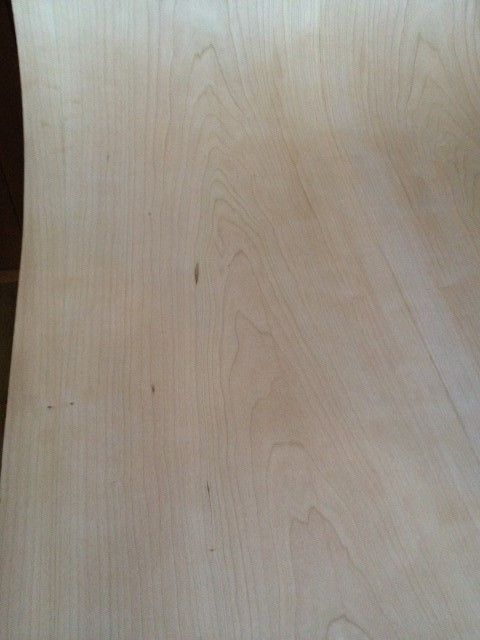
My veneer showed up today.
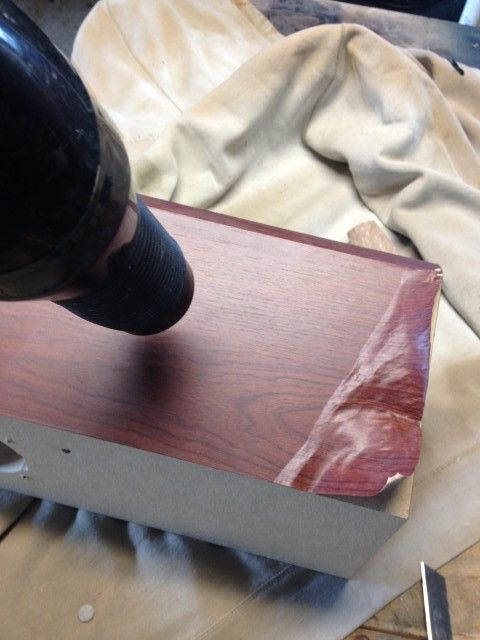
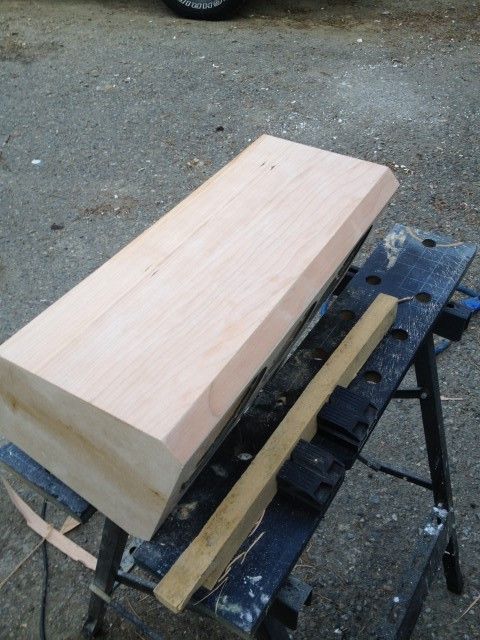
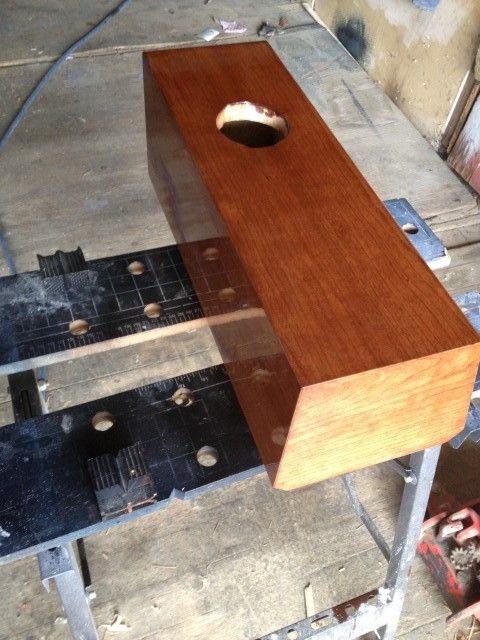
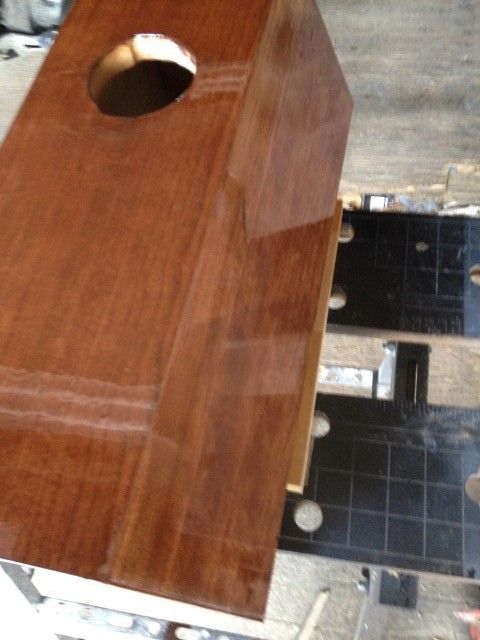
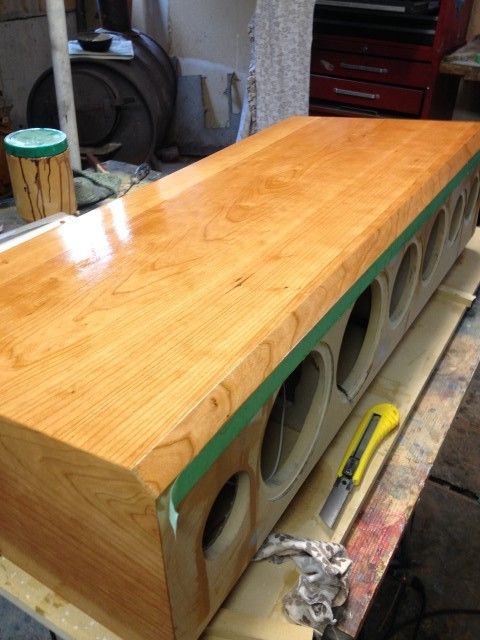
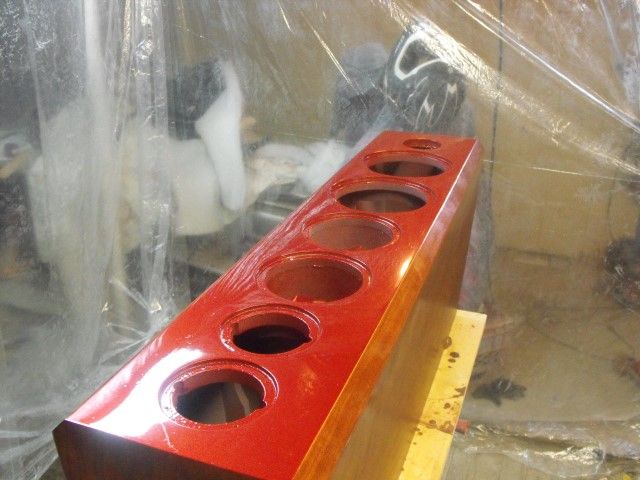
This is the beginning of a long weekend so here is my Friday night progress. Veneering is a very protracted operation. Since you can only do one side at a time and it take 15 to 20 minutes for the glue to set up , the time really gets eaten up. I have found that the best tools at my disposal in no certain order are as follows. My router with a straight bit, a bastard file, block of wood with fine sand paper (400grit) , plenty of utility knife blades. I have found that trimming the edges that are at an angle the best tool is a bare utility knife and plenty of concentration and patience and a steady hand. The glue left behind at the joining edges is a real pain to get rid of . If you don't have much for patience then this is a great way to learn some

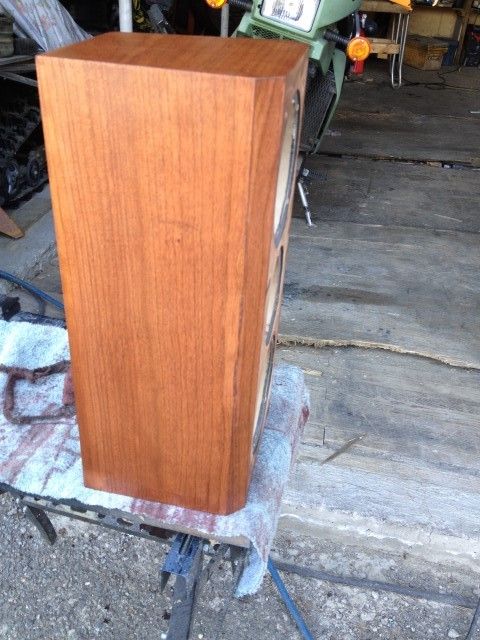
. Trust me , one mistake and it takes a long time to get all the contact cement off of the wood so my advice is to not make any mistakes. The picture below shows the edge and top done , this is 5 hours of work. There will be more pics if anyone is interested but not a whole lot of yapping.
Oh Ya its 9:40pm and its still daylight,sun just going down now. Plenty of time for progress yet.
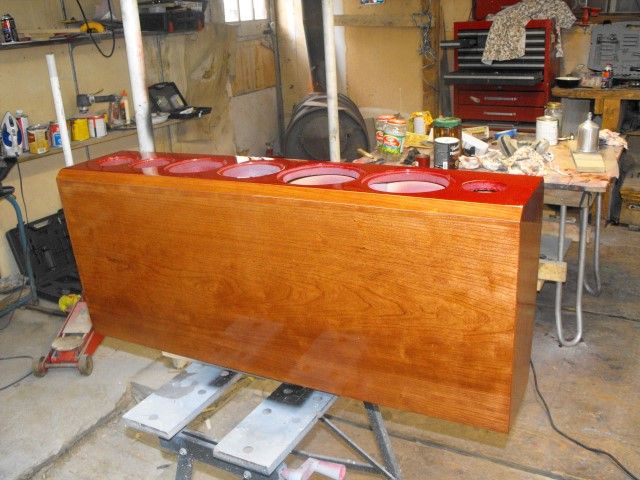
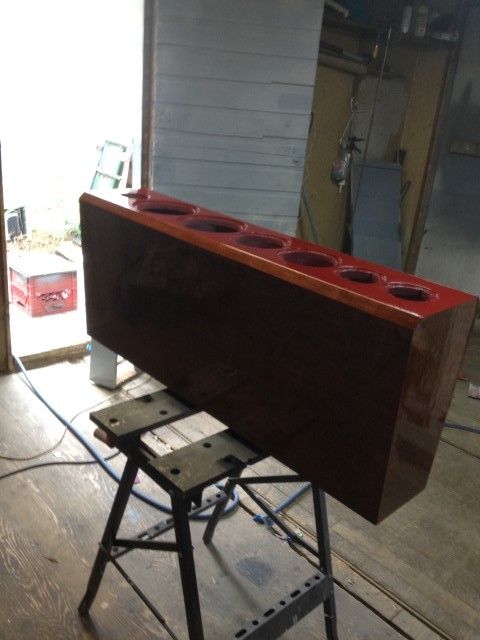
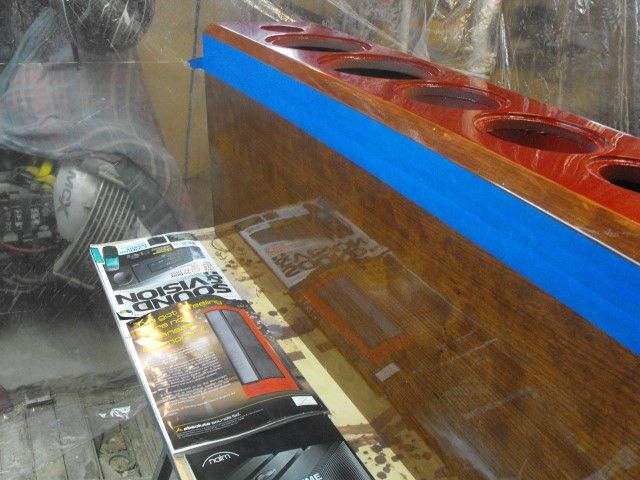
Stained and ready for Varnish.
Can I ask where you got the venneer material?
Ditto! THAT deserves an emoticon, but I'm experiencing so many different feelings right now.
Seriously, Richard, you are an awesome crazy man. You go!
People with "special needs" should order in MDF, then send 'em to you! Unless, of course, you really like using a heat gun.
Did you trim the edges with a knife, router or both?
Pissah result, duderoonie!
Matt the wood came from oakwood veneer in the USA. 2 sheets of premium cherry with their special backer for contact cement was 350.00 landed in the Yukon.
Peeling off the vinyl is not a fun job. If you watch the Axioms video on how their speakers are built you will see that the vinyl is applied and then the wood is cut and the speaker is folded together. The vinyl holds the speaker together until the glue drives. Once the vinyl is lifted the corners are an irregular shape and need to be squared up with a table saw and then some filling is required and I add more glue from the back side. I was going to get unfinished cabinets from Axiom a few years back but it is quite expensive since all pieces have to be cut and individually then glued ,which is much more labor intensive for them. I am still debating whether to carry on with the M80's since that would mean I would want to do the QS4's and M2's. Its not a one day job and then they are out of the system while I am working on them.
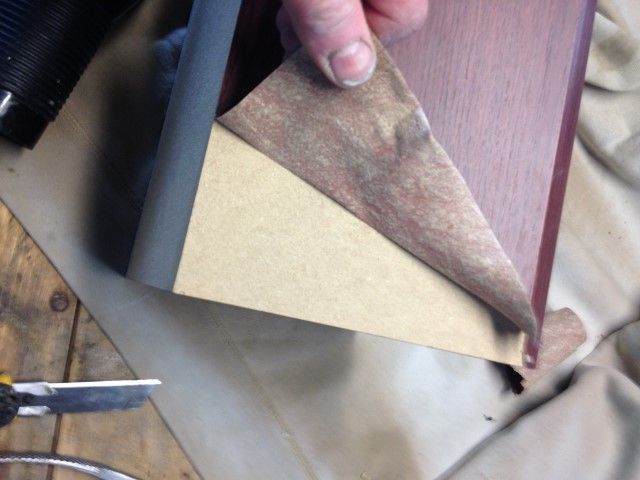
As for the trimming ,that is the hardest part. The weird shape of the speaker doesn't allow the use of the router so I try to get the edges as close as possible so there is very little trimming but this has its caveats because its hard to position the veneer when the contact cement is trying to grab it and once it sticks that's where it stays. I have found the good sharp round bastard file and my DA palm sander work best for the 45 deg edges. I did the VP 100 first since its not very visible in my room so I could get a sense of all the mistakes I would make, like putting the grain the wrong way
and most importantly which piece to put first to limit exposed edges.
...
Pissah result, duderoonie!
I have no idea what this means, but...
+1!
Bob likez soft wood??

Once you get your assembly line perfected, perhaps I should send you my VP160 for a 'make over' in HG Rosewood to match my M22s & EP800s, ha!!
TAM
Tam I am sure I could do that for you but I think the shipping would be a killer. Here is the wood portion of the VP100 done, I am just waiting on magnets to arrive so I can finish the fronts.
Yup, return shipping between BC & Yukon probably would be a lot.
Furthermore, the acres of Rosewood veneer (read - expensive!!) that the VP160 would require would be significant as well.
Your VP100 looks fabulous so far...
TAM
Bob likez soft wood??
You haven't met Bob yet...
How much work have you done with veneers to get you to this point? Looks like a cool project that I could actually do in an apartment. Well, once I get to all those other cool projects piling up.
Fred, I do all the layout and cutting of the veneer on my kitchen table. I am single so I can do what I want LOL , honestly it needs to be redone anyway. My first try was home built center channel similar to a VP180 and I used self adhering veneer which works great the sad part was they sent me quarter sawn instead of flat cut and I didn't notice until I was all done. The second experience was my home built 3Ways on the first page and that went much better. The hard part is cutting out the circles for the speakers. The VP100 is my third try and is a prep to doing my M80's so I can get thing straight in my head and try and perfect my technique. I did not look close enough at the veneer and missed a couple of dings that stand out but its ok since veneer is imperfect since it is wood after all. For some reason I make my mistakes on the top or the front but the back and sides always turn out perfect, go figure. One other thing, after I stain the wood which has to be done outdoors I seal the speaker with varathane and then I spray multiple coats of automotive clear coat. The clear is tough as nails and gives that piano finish with little effort and can be buffed up with a wool pad and light sanding with 4000 grit paper. I am not sure if I will ever achieve the perfection I think I should be capable of so for now I practice acceptance.
I always wanted to try 3-ways. Realistically, I end up with single driver projects because they're just easier.
I always wanted to try 3-ways. Realistically, I end up with single driver projects because they're just easier.
The way my mind works, 3 way speakers are the obvious choice when building a speaker. It just seems logical to me. I am really happy with how they sound and they look anatomically correct
Building a speaker can be a lot of work if you look at it as work. For me its quiet time for my grey matter, I enjoy doing it. I can take breaks from it and go back when I want to and the best part for me is that there is a start and finish and the results are usually gratifying.
On the three way design, I would tend to concur with your thinking here. For years I have read articles by both speaker designers and reviewers who state quite emphatically that with any sound, especially audio(music, movies etc.), ultimately, most sound falls in to that "mid-range" area(500-2000k). As a result, without a dedicated speaker that can best handle those frequency ranges along with a properly calibrated crossover, regardless of what the manufacturers might claim, anything else is essentially a compromise especially bookshelf designs and regardless of their price.
I covered an EP600 with cherry veneer. Sanded the leading edges a bit to put a slight radius on them and just wrapped them tightly with the veneer. Then I capped the top and bottoms. Roughed up the vinyl with a ROS and 150 grit. Used contact cement. Your technique looks cleaner. Nice work!
I covered an EP600 with cherry veneer. Sanded the leading edges a bit to put a slight radius on them and just wrapped them tightly with the veneer. Then I capped the top and bottoms. Roughed up the vinyl with a ROS and 150 grit. Used contact cement. Your technique looks cleaner. Nice work!
Are you saying that you used one single piece of veneer and went right around the whole sub box? How did you manage to get the veneer to bend at a 45 or 90 degree angle. I considered veneering over the vinyl but in the end it just seemed best to remove the vinyl, wood veneer is just too expensive to take a chance imho.
I got it damp, then rolled it over the front edges. One piece to the back corners. Rounding the front edges helped too, but they are somewhat rounded now. I posted pics somewhere. Maybe Mark's wood thread.
Hmmm , I would have never guessed, it would definitely look much nicer that way. I took a scrap piece a few days ago and tried out of curiosity and the grain seemed to open up so I never went as far as wetting it. I will look for the pictures.
People with "special needs" should order in MDF, then send 'em to you!
Why ya always dragging me into your conversations?
I had to go all the way to page 40 but I found it. Looks really good, nicely done.
I always wanted to try 3-ways. Realistically, I end up with single driver projects because they're just easier.
None of you ever got my reference. Slackers.
I got it totally and was about to elicit a witty response but thought better of it since we may be in mixed company. FWIW I would be happy to get a one way.
People with "special needs" should order in MDF, then send 'em to you!
Why ya always dragging me into your conversations?
Ha, If he was talking about you he would have dropped the "D" in MDF!!
[Drops the Mike] (probably on my toe)
People with "special needs" should order in MDF, then send 'em to you!
Why ya always
dragging me into your conversations?
You mean "rolling" you into the conversations? I can't believe I just wrote that!
Don't BS us, Cam. You don't have any "special needs" that can't be completely covered by a hot, $1,000-a-night "courtesan," you little white-bread lothario trash.
Cam, you'll always be "special" to me, cause you're always up for getting down in the mud to play.
[i]
People with "special needs" should order in MDF, then send 'em to you!
Why ya always dragging me into your conversations?
Ha, If he was talking about you he would have dropped the "D" in MDF!!
[Drops the Mike] (probably on my toe)
See, see what I've wrought!?!? He just pops in (no, no, "buzzes our houses"), dropping surreptitiously-routed F-bombs. Then, just as quickly, is on to his next post to fling crap aboot [sic]. It's all emoticon-free, too! I am old and unneeded overnight.
Don't BS us, Cam. You don't have any "special needs" that can't be completely covered by a hot, $1,000-a-night "courtesan," you
little white-bread lothario trash.
You know me well
.
Richard, you are a true craftsman...
TAM
Funny I was thinking about that very phrase the other day at work. Perfection is something I strive for but never seem to attain. To me a craftsman is someone who is great at hiding their mistakes. I am glad I did a small speaker first to hone some of the necessary skills though I doubt I will ever get things perfect. It has been fun and frustrating all at the same time and the finished product looks great is a bonus.
The fronts were going to be a dark metallic red originally but a funny thing happened. The magnets messed up the metal in the paint and polarized the particles. May try for a pearl instead for the ones in the living room.
I can say with great certainty that what Axiom charges for real wood is worth every penny. It requires a lot of equipment and skill and time. Lately I have seen quite a few more comments being made about the prices Axiom is now charging for their speakers and I can say first hand that given all the expense of building a speaker like the M80 they are still a great value.
Richard
I have always thought that Axiom's 'Real Wood Finishes' have been reasonably priced - but in reality are still quite expensive for many people. Many exotic veneer materials such as Rosewood have become almost prohibitively expensive, especially when they come from elsewhere in the world where transportation costs for heavy bulky items have increased dramatically. Furthermore, the time, labour & skill that it takes to apply a HG finish is significant as well.
I suppose that the price advantage that some other manufacturers enjoy is due to the cabinets being built in low wage areas of the world; however, for me, it is nice to see that this kind of craftsmanship is still being fostered over here...
TAM
Great looking cabinets there Socket. Proof that Desire + Garage can = Awesome!
Great looking cabinets there Socket. Proof that Desire + Garage can = Awesome!
If said garage had a decent floor the project would be much more fun. It used to have a hard wood floor

that has caved in and now has random plywood on it. When you walk the work tables wobble etc and dirt is everywhere so painting is a real chore, I spray then step out right away to minimize the dust. I may do something with it this year, maybe fill it with sand and paving blocks.
Damn you do good finish work!
I can build anything, but when it comes to finishing.....gggggrrrrr - I cannot stand it. So much so, I bought an HVLP sprayer, and I shoot my projects with a water based clear, and that's it.
Do you paint cars?? Need a "winter" project??
Michael , if you knew how much trouble I went through to get the front painted LOL. My impatience cause multiple screw ups that required complete removal of the primer and paint and clear numerous times. This is how I learn patience
. I have only repaired and sprayed a few quarter panels and I do that at the shop I work at and it really stinks the place up.
I am about to investigate water based clear since cleanup is a real pita and has to be done too many times when doing a small project. I understand the air system has to be really dry , at least according to the guy at the paint store.
Heres another update, mostly finished until the clear coat cures for a week or 2. Spent a few hours rubbing sand on it then rubbed it with a sheep at high speed.
OK, now I want a high speed sheep. I'd have the first one on my block...
Amazing job!
Well, That looks awesome. Certainly going better than my little project.
I think I mentioned tearing down the crappy drywall in my HT room?
Well that led to finding a nest of carpenter ants.
That led to finding wet wood from a leak under the door above.
That leads to me having to remove a section of the outer wall, replace all the outer wall and reshingle.
Smart little ____ers. They stayed in the walls and floors so we never even knew they were there. They were well established though. It looked like someone was running a power saw in places.
The ants are now all dead after a professional came in to spray the house inside and out. I guess I do owe them a thank you for making me find the wet wood before mold set in. I didn't repay them very well, I guess.
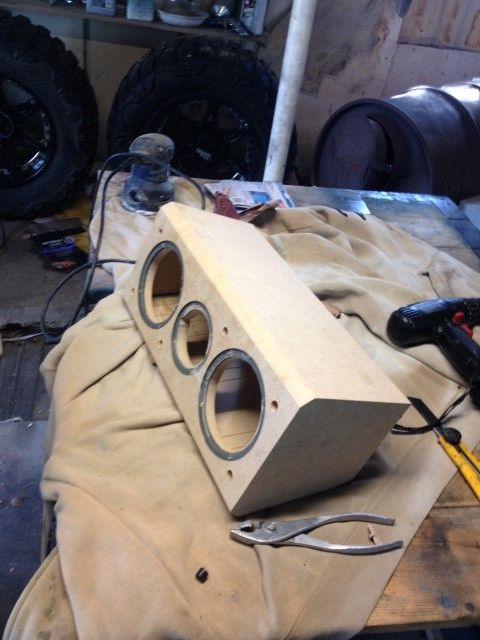
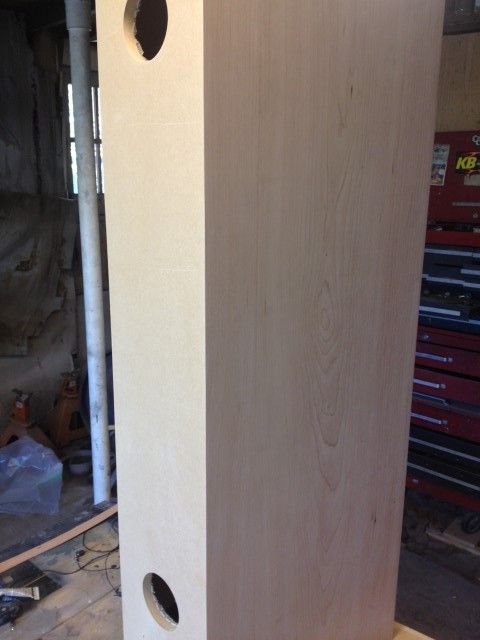
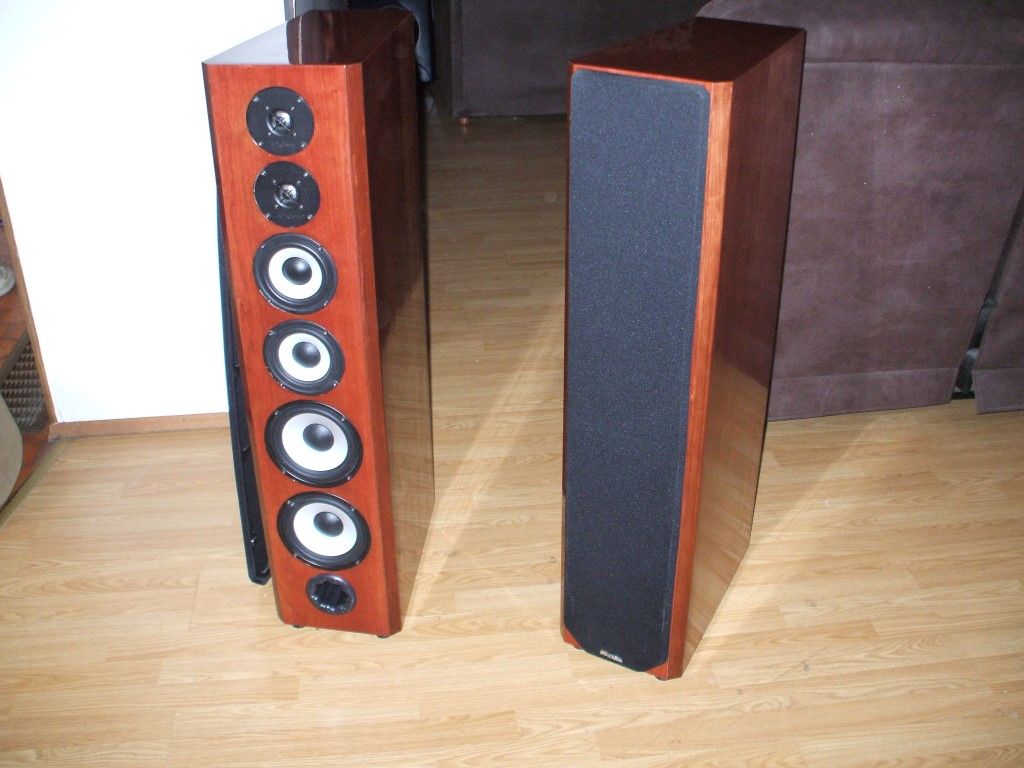
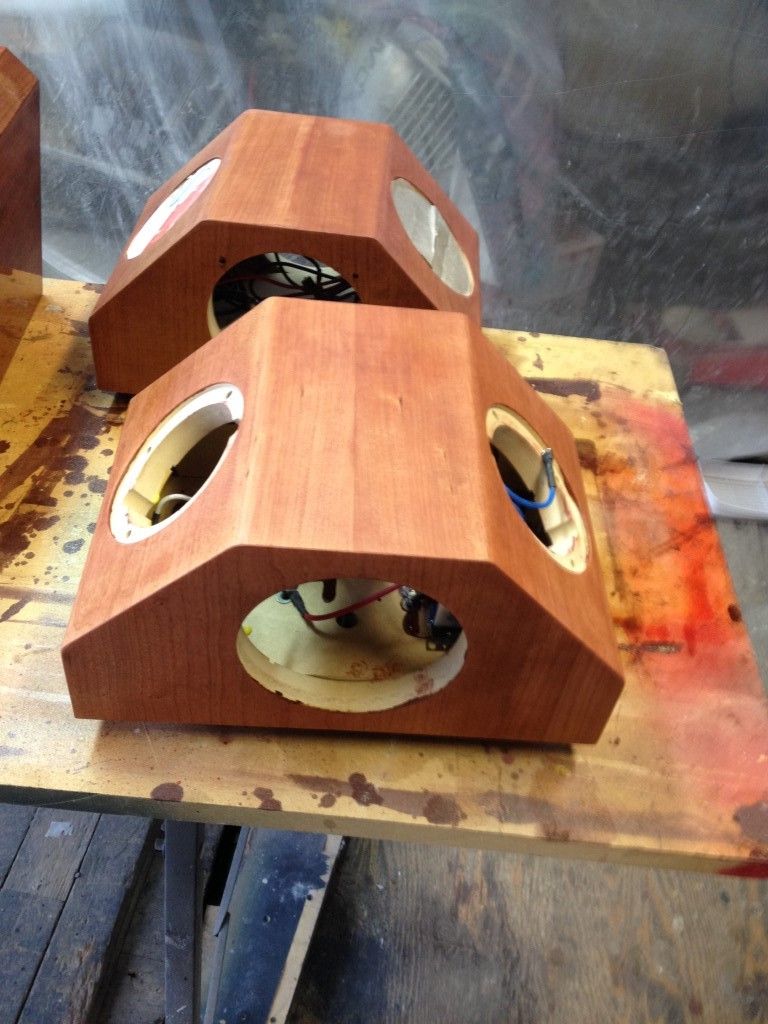
So I have been making a bit of progress on my M80's. This is going to be huge, way bigger than I had anticipated so I am really dogging it. So far I have one stripped of the vinyl and I am working on the speaker holes to make the drivers flush. I made a tool out of old particle board to grind the holes down using my drill and a roloc disc in my air grinder. I think it will look really good when done. I am just waiting on a router bit to show up so I can begin gluing the veneer on.

For anyone following along, I have 2 sides done on the M80. Its slow going since I only have use of my right hand so I have to watch not to make mistakes. hopefully I will get it mostly done during the rest of this week while I am off work. FWIW rolling on gel contact cement gives the smoothest base for the veneer.
just one pic phone always dies at the worst time
That is looking really clean & pristine...
TAM
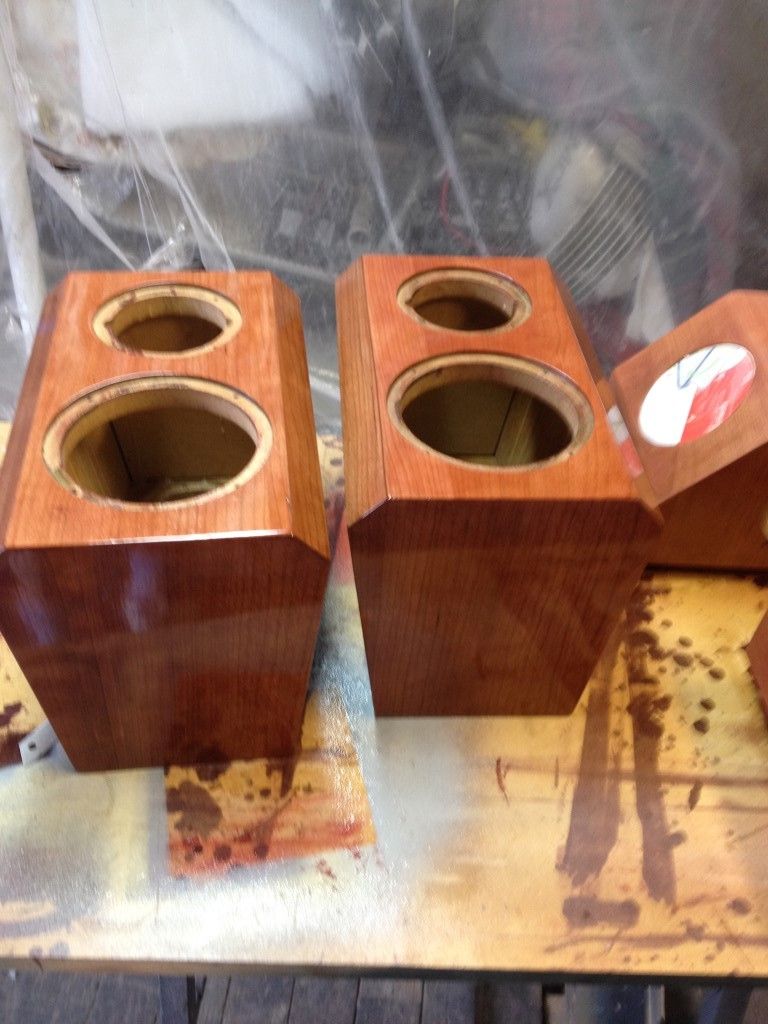
thanks tam. I have really learned a lot doing this and my technique has become quite refined.
Stain prep on
First Coat
Amazing and beautiful work!
Agreed, the finish looks really good, so far!
Oh, sure! Add "so far" to account for the spider that will walk across his next wet surface!
First 2 coats of clear, sand smooth and 2 more coats.
That just gets better and better!
I envy your skills!
Thanks guys but that's just the beginning. So much waiting and so little doing at times. 2 days ago I almost took the hammer to it, things were just not going my way and my temper almost got the best of me. But alas I am moving forward , more to come temper permitting
Final coats of clear. This stuff is nasty glad I don't work in a body shop.
Final coats of clear. This stuff is nasty glad I don't work in a body shop.
Two thoughts, Richard:
umm, wait a minute. It's after 4:20, so I need a bit more time to thin.... oh yeah...
1.) Until you're done with this project, you should check in here every 24 hours and leave someone here with a phone number.
2.) Send that last pic to "Sound and Vision" with a caption that reads, "I used to read them first." Probably the same publisher as "Spray Shield" magazine, anyway. Do you have a cat or puppy???? Nevermind.
How'd you get the port plugs out? I was thinking about doing a set of M80 Ti's I have.
I was going to share that bit of info but really did not think anyone would be interested. At first when I took off the vinyl I cut around the port's but when sanding I bumped one of them and that really pissed me off. Upon further inspection I saw that they were pushed in with a bit of glue around the outside edges on the backside, so I took a chance and just used a long piece of mdf and a mallet and all it took were a couple light taps .
Bob would have used peanut butter.
Wonderful - a work of art.
I hope that it's not windy outside because I'd hate to see a mishap...
TAM
Thanks for the concern Tam
The weather today was very hot with a few clouds and little to no wind but lots of pollen in the air. It dried in the shop then I moved it outside to get some UV goodness. I really learned a lot and am now working on the second one which is going so much smoother, if only I could learn some darn patience.
Most of my patience left me about 20 years ago. It must be something to do with aging...
TAM
One more question..... You may have already detailed this and I have missed it. I'm wondering what you did for the grill pins. Did you install magnets? That's something I'd like to retro into mine.
Micheal I bought neodymium magnets off ebay 1/2 x 1/2 . the plastic holders were drilled /pulled out and then I made the hole just big enough for a tight fit for the magnet then I chamfered the holes and filled over the magnet. I have yet to find some .020 stainless stock to glue to the grills but that will work itself out .
Richard
Stainless? You going with 304? Not sure if that will have enough carbon in it.
For my center I used some pieces of stainless feeler gauges. There are 2 types austenitic and ferritic the latter being magnetic. The grills are not very heavy and with stainless I wont have to worry about it marring my finish or rust.
Damn that's a fine job you've done. I wish I had the space to do this sort of work.
TADA
One down , One to go then 4 more LOL
Poor wallplate.

great looking finish! Nice work.
Poor wallplate.
great looking finish! Nice work.
Sorry bout the wall plate , I be trippin
Its a prison shank now.

Imagine if you can, taking my speaker and having to scrape off all of the clear coat, paint and primer. Yesterday was a sad day, I noticed a bubble in the paint and I picked at it and the paint started flaking off. On the second speaker I ran out of the primer I spray from my hvlp gun so I bought primer in a rattle can and that's where the mistake was made. Its going to break my heart to attack the other speaker but symmetry is important.So I am moving into phase 2 while I wait for my QS8's to arrive .
I feel your pain, Richard. It's the down side to being a Platonic aesthetist, poor guy. In order to bring a project that far back, I'm now at the point that I get really wasted first. It takes way longer, but it really doesn't feel like it does.
Now to decide which one. Real wood or painted. Help me decide
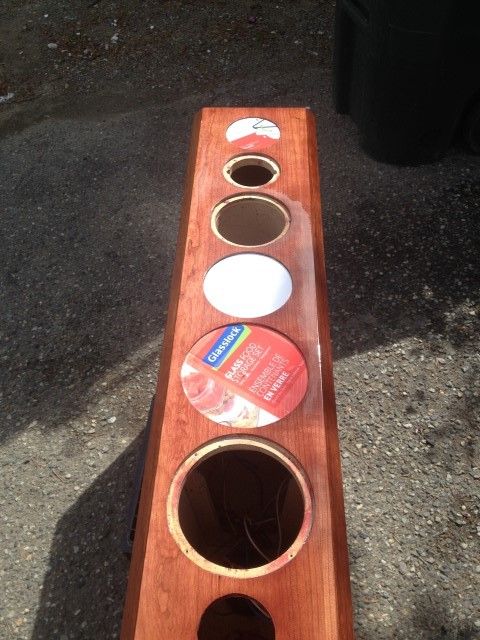
I personally prefer the real wood look. If you are putting in all that work, then why not have something beautiful like real wood.
Thanks for input matt. Actually the paint was more work, since trying to hide the holes where the magnets are was a PITA. The veneer is a snap other than trimming the edges at the 45deg angle .
What you can try if you are up to it.. I don't know how you did the finish on the outside bits... but I imagine that you were using a HVLP with a nitro-cellulose lacquer. Have you thought of tinting the finish with your umber red to give the colour that you had but still maintain a level of opacity so that the grain of the wood still shows through? If you laid a coat or two of tinted and then clear you will have a spectacular look giving the best of both worlds.
Now personally, I find the unber red a bit too bold for me. I think that something more of a black cherry so that you can see a rich detail of the grain with the contrast of the blacks in the grain. Now you might need to experiment on some test pieces before you give it a go on your speaker. Consider using a dark sanding sealer before the tinted lacquer to make it pop.
Just a thought.
ie:

Matt the more I think about it , I will probably just go with the stained wood and leave the door open for down the road to spray a lite coat of color over the clear and then re-clear. I sprayed the red from a rattle can and it does not cover well at all ,very uneven. A pint of the red paint is 75 bux plus reducer which I am not willing to lay out any more money at this point. I am spraying Nason 2k spot panel urethane clear coat , not sure how I would tint that but thanks for the idea..
BTW , its hard to tell from the picture but the painted speaker is a chilipepper red with pearl. These are just cell phone pics so not the greatest.
Contact WoodEssence
http://www.woodessence.com/Dyes-Pigments-C10.aspx I used the ColourFX, but I would look into the Mixol pigment and add in a bit of the Oxide Red #4. (I did the Colour FX Burnt Sienna but also as it was an antique solid walnut bed used a black sanding sealer to fill in all the grain pores. lots of work but the end effect was stunning.
They are very knowledgeable and have helped me in many of my projects that I was looking on adding some colour to my work. Did a great job with some walnut for a bed restoration for my daughter I have gotten many comments on that job that has led to more work from friends and family.
A friend of mine is presently in The Muskokas where they just had a gathering of classic wooden boats. I don't know if you've heard of this product that they use in marine applications, but it sure looks nice. Here is his email to me:
Tom, when I was at the Antique Boat Show in the Muskokas in Gravenhurst, I asked a guy at the canoe display what to refinish my cedar strip canoe with. He told me to use the same stuff they use on the old woodies, which are absolutely magnificant! Anyways, it is called EPIFANES. I thought if you ever had to refinish, or touch up, your wooden bow, this would be ideal. WHAT AN AMAZING RESULT. An excellent spar varnish, which also comes in colours.
Web site -
www.epifanes.comTAM
Very interesting , thanks Tom. I see they have colored polyurethane , though they have no prices. I may inquire just for giggles.
Be prepared for the worst, ha!!
TAM
My QS8's arrived , one came Thursday and one on Friday. I do not know how FedEx does it but it happens every time, at least they are consistent. I will not be doing the QS's right away, I need a break from all this for a bit. As soon as I finish up the M80s I will run Dirac and then see how the QS's sound, they seem good so far. I got new mounts from Amazon for the M2's, can't beat them for 30 bux, though they are only 9 bux from monoprice in the states.They only come in black so I had to paint them white before using them. Rated at 33lbs though I think that's highly unlikely , the M2's are pushing it now.
Using those as rear channels or heights? Looks good from where I'm sitting.
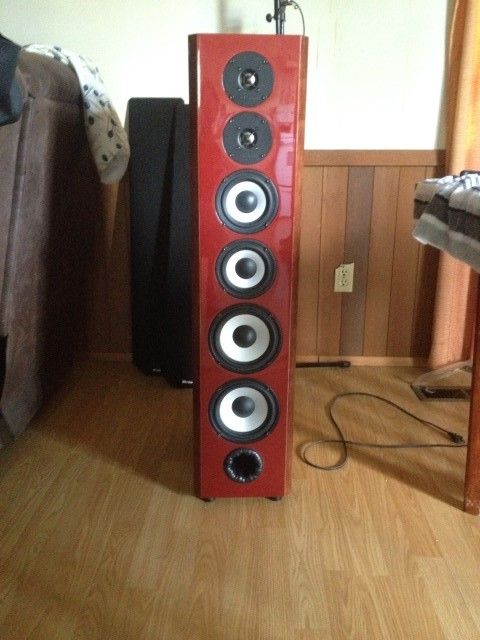
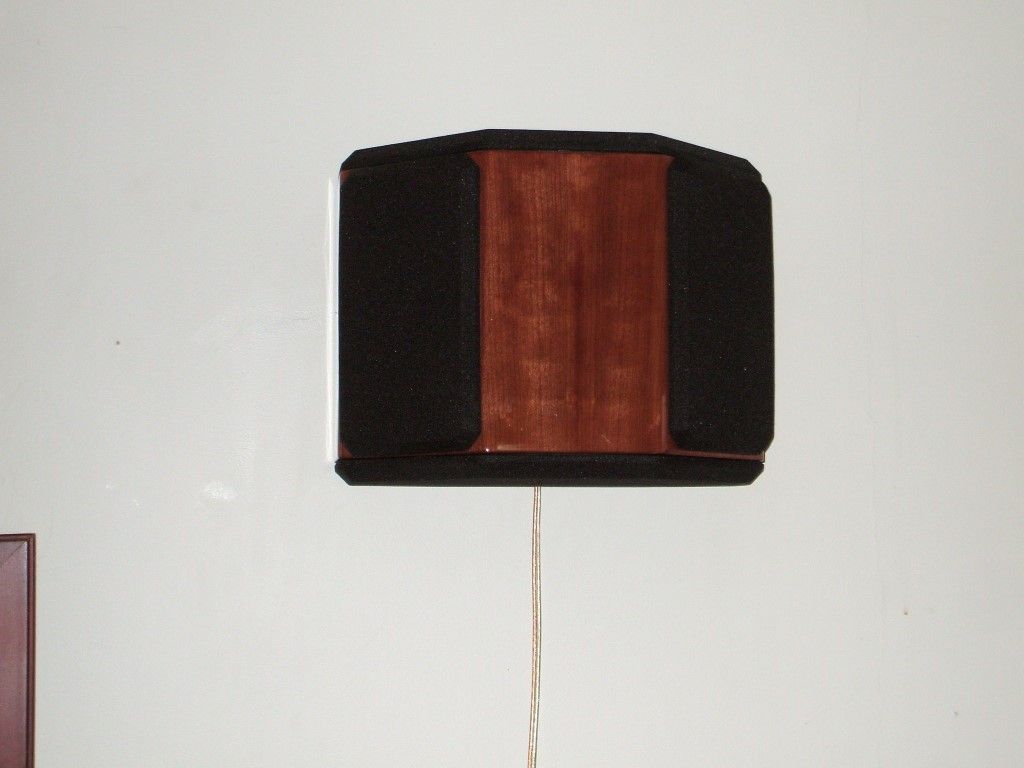
So here is the finished speakers (AGAIN) . Now to wait for the clear to really harden for final sanding and polishing.
Using those as rear channels or heights? Looks good from where I'm sitting.
They are my rear surrounds for 7.1 . They work really well and am very happy with them. I was really waffling between M22 on walls and QS8's because of how much I like the M2's. When I had the M2's and 2 8 inch subs , at normal levels they were very close to the M80 experience.
Lookin' good! I am amazed at your skill in finishing things.
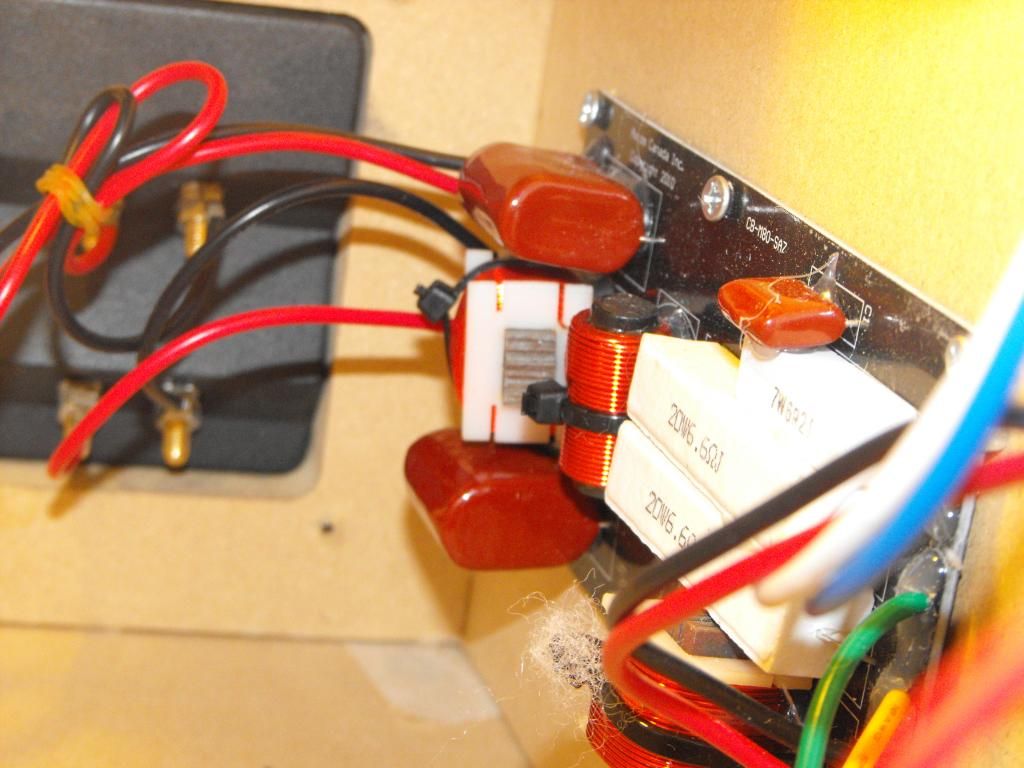
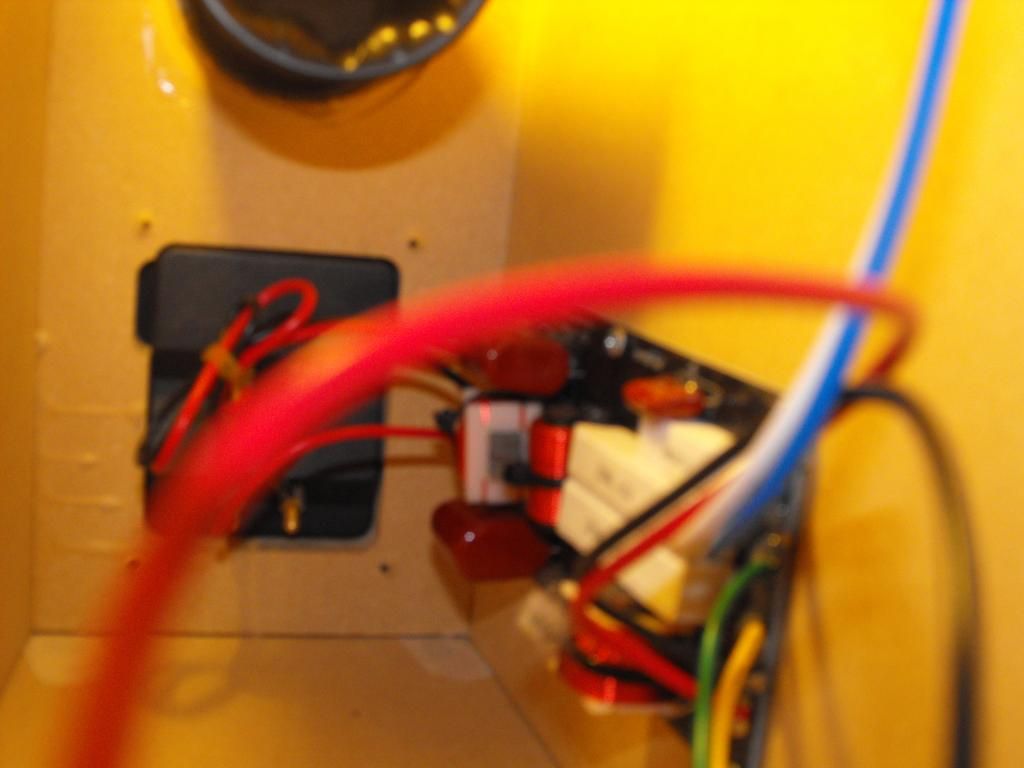
Got any pics of the innards? Are the drivers soldered to the wires back to the crossover, or are they slide off spade style?
Those look amazing! Beautiful job!
Yes, they do look fantastic. I prefer them far over the painted version from earlier.
Ken here is some pics I took when I replaced all the drivers in my M80's. The connectors are spade type with shrink tube on them and of course soldered to the crossover board.
Matt,i have to agree with you . The painted looked good but the veneer exudes a sense of quality. Of course there are mistakes here that will bother only me, one of the downsides of DIY
Richard
I have always marvelled at speaker design and how simple they look. In the back of your head you think that what really are they, a wooden box with some speakers, wires and a few bits of electronics and can cost thousands of dollars.
The photo makes the cross over board look almost simplistic in design, but in reality it's more elegance. Any it is so easy to miss the fact that thicknesses and placement of internal bracing and size, shape play such a roll in the sound. Anyone can make a speaker.. the true art comes into making one that sounds good.
My M8o's are V3 , the V4 has more bracing in them and they also have the plastic cups behind the mids which makes room for more bracing.
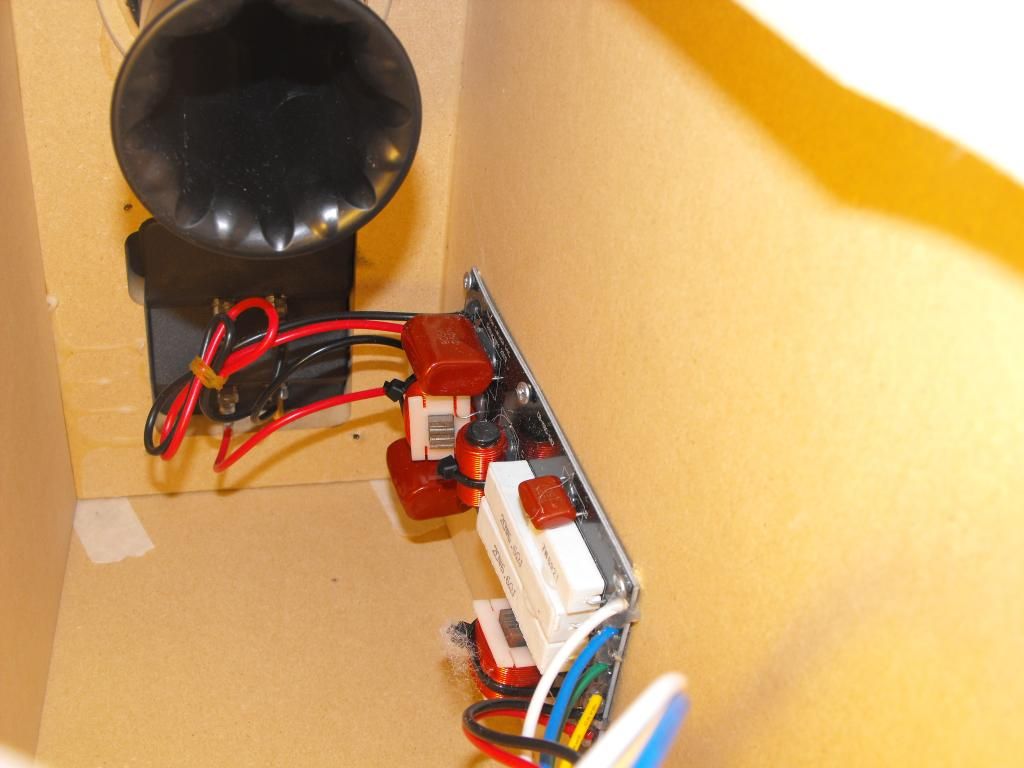
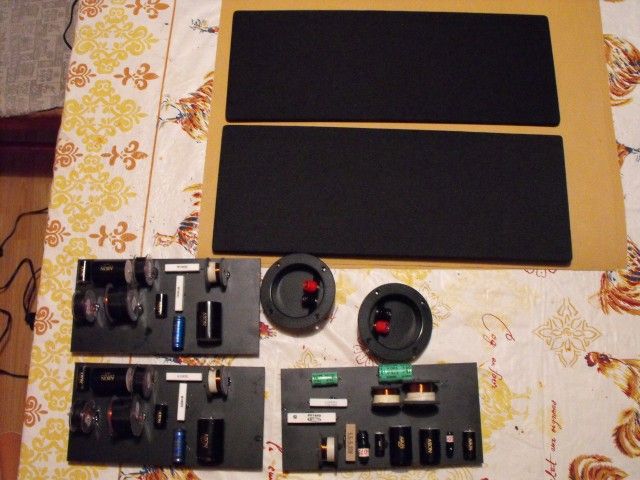
These are the crossovers I built for my 3 way axioms , the one on the right is for my center channel. When you stop and think about everything that goes into a speaker it is no surprise how expensive they are to produce and ship.
My M8o's are V3 , the V4 has more bracing in them and they also have the plastic cups behind the mids which makes room for more bracing.
These are the crossovers I built for my 3 way axioms , the one on the right is for my center channel. When you stop and think about everything that goes into a speaker it is no surprise how expensive they are to produce and ship.
Oh mercy Sockets, you're on fire this summer.
If i ever get back up to Whitehorse, i'll need to see those gorgeous speakers.
Well done!
And here i am plugging away on refinishing ALL the wood trim, baseboards and doors in our house with no where near that level of finesse (spice honey oak be gone!!).
That being said, i may look for some tips as i plan to refinish the beaten up walnut veneer on some old Mission 737s.
http://seventiesstereo.blogspot.ca/2010/10/mission-737.htmlExample photo (these are not my pair but rather someone's whose are in much better condition):


Chess my door is always open to a fellow Axiom- ite or is it moe. At any rate drop by any time.
Those speakers have been veneered very nicely, I wish I could source veneer of that quality. It is a fine line between a nice smooth surface and the backing paper . I don't know that I can offer to much advice, I pretty much fly by the seat of my pants,but I will try if I can.
Richard
Fly by the seat of your pants my foot. You do gorgeous work. There is skill there.
M2's ready for clear. Didn't strip the vinyl this time and seems to be holding good, time will tell.
Are you clear coating right over the vinyl?
I really like that idea if it doesn't melt, ha!!
TAM
Lookin' good, Socket! When you're done with the Axioms, you might want to look into finishing that table!

If he's sloppy enough, he can do both at the same time!
My M8o's are V3 , the V4 has more bracing in them and they also have the plastic cups behind the mids which makes room for more bracing.
These are the crossovers I built for my 3 way axioms , the one on the right is for my center channel. When you stop and think about everything that goes into a speaker it is no surprise how expensive they are to produce and ship.
Awesome, Richard, you go! BTW, your great grandmother called. She wants her rooster table cloth back.
Lookin' good, Socket! When you're done with the Axioms, you might want to look into finishing that table!
I thought about doing the table but it belongs to the EX so I use it to cut my veneer with my RAZOR knife. MUHAAAHAHA
Bob, the roosters have left the coop , look up a few pics and you can see my new table cloth. I buy whatever Walmart has for under 5 bucks.
Hey give the guy a break.
It's not like there's a whole ton of fancy options for table cloths in the north.
Some of the best furniture people find is actually at the dump.
What do they call it again?
Walmart North?
Here are the M2.5's sprayed with clear and my QS9's ready for clear coat tomorrow.
Tom, btw you can spray the vinyl with clear but honestly it doesn't make it look any better imho.
I kept looking for a Fisheye shot that looked like I was on LSD, but didn't see any.
Beautiful work! I'm envious; finishing is not one of my better skills.
Ok last pictures , I promise. Mark , I didn't take a pic of the fish eye , just cleaned the water trap and did a dust over let that dry and then smashed a heavy coat on, no more fish eye.

Sprayed the QS's today and ended up with fish eye , resanded and fish eye again, WAH. DOH , haven't drained the water separator in ages , after that I was golden.
Beautiful work!
I have one of
these after my separator and an automatic discharge valve on the bottom of the tank, eliminating more than half the water that makes it to the separator.
And I use
this stuff in the first coat of clear as added insurance.
Thanks for the suggestions scott, seems the only way i learn is from my mistakes. I should really replace my air line as well since its older than the hills.