Where to stick it….
Among the considerations in setting up a home theater beyond budgeting, equipment choices, etc., there is the mundane (at least some think so) process of figuring out where (and how) it's all going to go. As I mentioned in the opening post, I have a 100 year old house that presents a few challenges.
Mounting the QS8s
For starters, my house doesn't have sheetrock with neat 16" on-center 2x4s that can be found with a stud finder. My walls are horsehair plaster over lathe. I couldn't find a stud behind a wall in this house with anything but a lucky guess (insert your own joke here). This presents problems when I want to wall mount something that I consider to be heavy… such as the QS8s. My experience (and a bit of common sense) tells me that if I spread that weight over a larger mounting area, I'll end up with a stronger result.

Originally, my idea was to mount the QS8 on something of a "shelf" with a hole cut within the bottom to afford room for the 5 ¼" bottom-mounted woofer. What I hadn't realized, however, was the T bracket that comes with the speakers is a simple but very effective method of mounting the speaker. Still, I needed to increase the surface area and decided that a "plaque" would do well for me. This is what I ended up with:
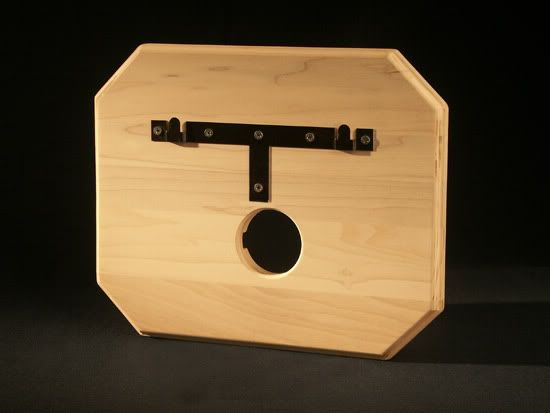
This "plaque" is made of Poplar and is about 3" bigger both vertically and horizontally than the QS8. I had debated about the merits of varying plaque sizes. If I made it smaller, the speaker would appear to "float" from the wall, but I assume that the speaker was designed to "couple" with the wall and thought floating it out from the wall would be a problem. Along the same lines, I might have designed the plaque to be much larger, giving the speaker a decent-sized surface to couple/reflect with. Unfortunately, I think that would just be visually "heavy" to have the speakers mounted on big, oversized plaques. In the end, and without testing the sound of it at all, I decided that the diffuse nature of the QS8 would likely mean that I wouldn't have to worry about "edge effects" with the size of the plaque being what it is.
I cut the corners off both to reduce it's "visual weight" and to follow along a bit on the angled design of the speaker. I went over the edges with a router, drilled a large hole in the center and beveled that as well with a ¼ round bit. The hole is for the speaker wire to pass through and is off-center because the jacks on the back of the speaker are not centered. You also might notice that there is a channel cut on the inside edge of the hole; it runs to the left edge in this photo and allows for the 12-guage wire to tuck behind the mount. Note that the two speakers required a mirror-image pair of mounts; they're not identical as I wanted the wire to run towards the "back" of each mount in their respective positions.
I also needed to cut the bottom of the T bracket (it's normally "taller") so as to not block the hole. I made use of all the screw holes that the bracket had left, and with the screws being driven into hardwood, I have no concern about its ruggedness!
Here's the QS8 mounted:

The finish, as with other pieces I'll illustrate shortly, was a custom mix to get as close to the color of the Axiom Beech as possible. Like the others, it (strangely) looks quite different depending upon the light and the angle you view it. Mostly, it looks like an exact match for the Beech; other times it's merely "close enough".
Another issue with these old walls is fishing wire. I chose not to do this and instead used Wiremold channels to hide the wire from the floor up to the speakers. If you really crane your neck into the corner, you can see the exposed speaker wire where it exits the Wiremold and enters into that "channel" in the back of the plaque. No one has noticed it yet, so we'll keep it as our little secret.
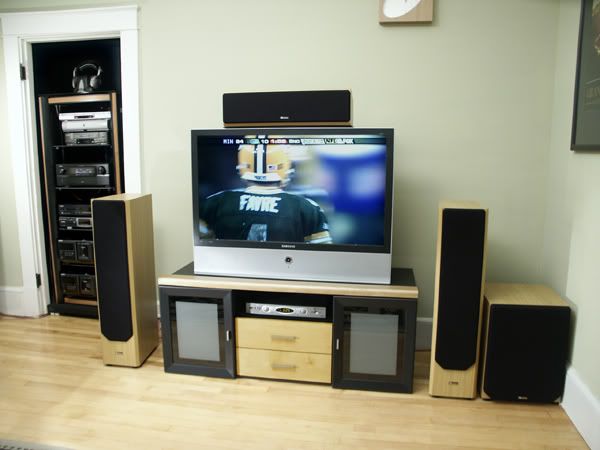
Another look at the room shows the QS8s as they relate to the rest of the room:
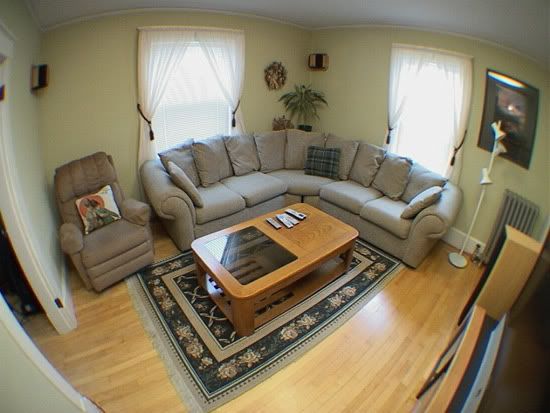
All in all, I'm very happy with the placement in terms of sound and the mount in terms of aesthetics and strength!
Like walking a tightrope….
Something tells me that I'm not the only person who is running into a problem trying to place their Center Channel somewhere around a DLP. If you have room underneath, that certainly can work, but many people (myself included) don't have room for a good-sized center channel on their stand. And, quite frankly, I prefer a center channel up above a screen rather than below in most cases as I believe it projects better, doesn't interact with the room (floor) as much, and doesn't get blocked when your dog walks into the room and just stands there! The problem, of course, is that the top edge of DLP, LCD and Plasmas are too narrow to support a speaker.
Well, if my plate weren't so full, maybe I would look into starting a company to make a nice powder coated steel, adjustable stand in several models and styles to fill this new need people have….(and if any of you steal the idea and make a million, I want a beer out of the deal! And a good one, too….no cans!). Anyway, this is the idea that I had sketched out early in the game:

What I built ended up being pretty close… though I didn't need the "feet" and not knowing any local welders, I made it out of wood:
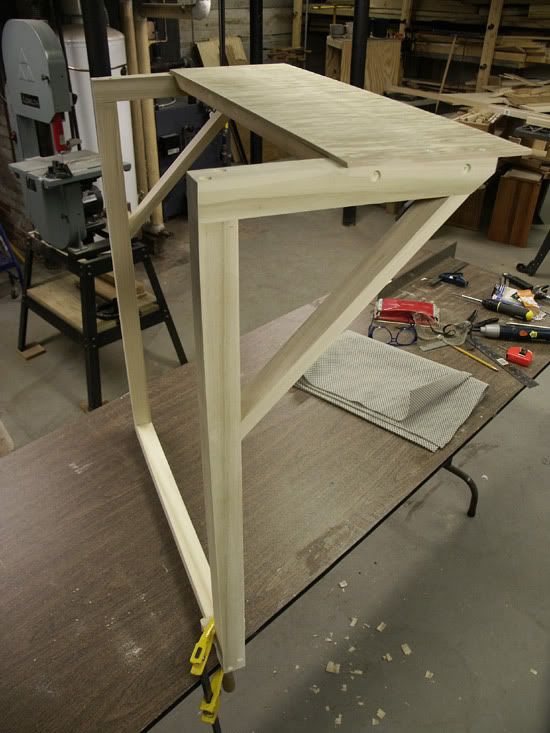
Above is the unfinished (obviously!) center channel stand still in the workshop. Once again, it's made of Poplar (2x2s) except for the ¼" plywood shelf.
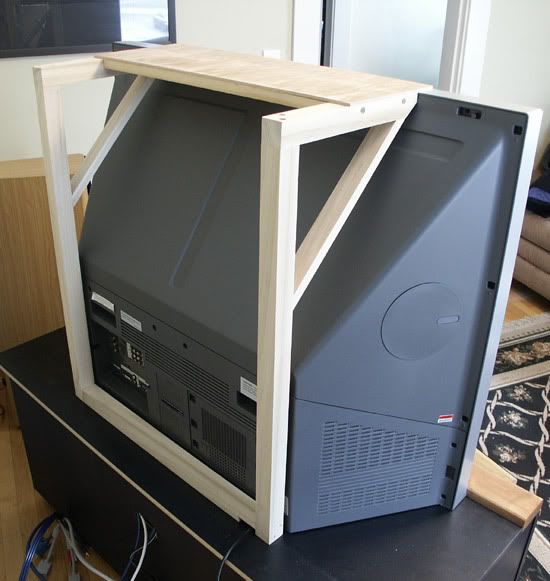
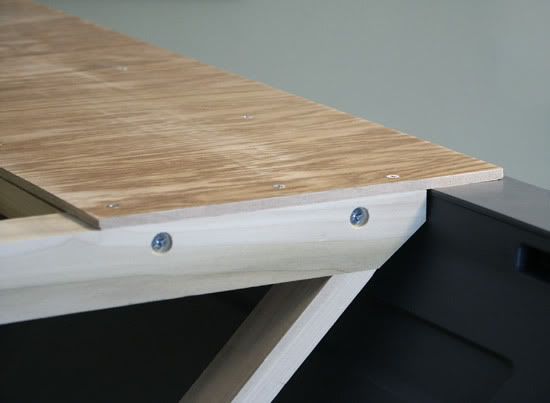
It's designed to fit behind the Samsung DLP and offer a shelf that just barely "floats" above the top edge of the TV. Accuracy in sizing is everything, and the photo above is from a "sizing trial" to ensure there weren't any miscalculations. The "feet" that I designed in my original drawing weren't necessary because the TV stand I purchased and modified had a "lip" in the back allowing me to simply attach the bottom edge with a couple of bolts and wing nuts. See out-of-sequence photo of already-finished stand (see arrows):

The dynamics of the design are such that the bottom piece really wasn't in need of being attached in a way that required brute strength; really, the back just wants to "slide out" a bit as the stand wants to lean forward with the weight of the speaker. I just needed a way of stopping it from "kicking out". The reason that I was being so critical of the sizing is that I did not want the DLP to be supporting any weight of the speaker. The design is such that if the measurements and sizing is perfect, the stand will only "kiss" the top of the DLP and not rest any weight on it.
OK, back to the design and measurements. The width coincidentally was very close to the same for the width of the center speaker and the "spread" of the two vertical "legs" so as to not block any of the connections of vent holes. There's a notch cut into the bottom (bottom right in the above photos) to allow for the power cord.
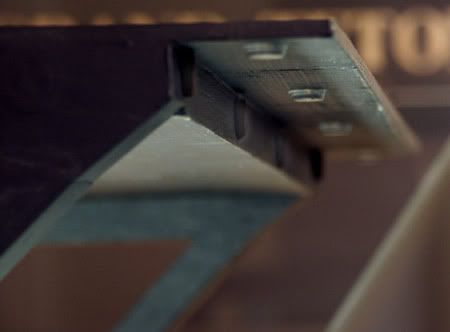
Below is a photo showing how the shelf has a "lip" that protrudes over the top of the DLP:
In this photo, the lip and DLP are touching because it's "leaning forward" on the DLP…it wasn't bolted on the bottom yet.
In actuality, the two surfaces that "meet" the DLP had small rubber "bumpers" and felt pads installed so the wood won't make contact:
The height of these bumpers was actually figured into the height of the stand for that "kissing" effect explained above. There are also 4 very large "bumpers" on the top of the shelf that the speaker itself sits on. This protects the finish on the Axiom and prevents it from vibrating off during particularly intense sessions!
Another shot of the "sizing trial" from the front:

And finally, the end result, after being primed and painted flat black:
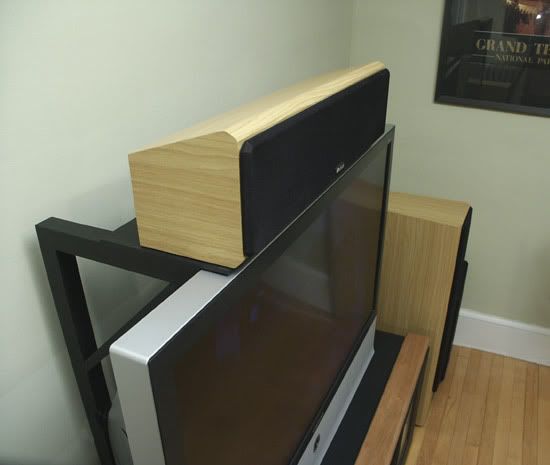
It does exactly what I had hoped: It places the speaker above the Samsung, in a strong and essentially "invisible" way and does not place any weight on the TV itself. The contraption is not visible from any normal angle in the front.
Standing Around…
I guess this is as good a time as any to write about the TV stand.
I had been trying to figure out what to use as a TV stand for my Samsung 46", and wasn't coming up with great options. I could get a Bell'O that matched my audio rack, but that would be $500, be taller than I wanted, and not match my Axioms. I could get one of those other glass and steel stands, but really, my room isn't totally "modern" and the better ones again are pretty expensive. About the only time in two weeks when I wasn't really looking, I came across this at Target:
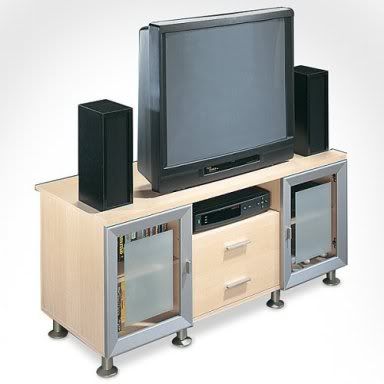
and wondered how close it's Maple finish would be to the Beech Axioms. It was a tad taller than I wanted, but I could choose to not attach the legs. The silver accents would match the silver Samsung and silver HD cable box. It even offered some storage that I could use (since I recently lost a whole closet!!). Otherwise the size and price ($130!!) was right. I brought a carefully printed photo of my Axioms' finish back to Target and discovered the match on the finishes was really not very close at all. It was then that I noticed that they had the same model in black. Problem was, I didn't think the all-black stand looked nearly as nice as the Maple (it was all black except for the silver design on the doors). Anyway, I decided to buy it and modify it. As seen in previous photos:
There were two black pieces that I replaced and stained to match the Axioms (though, as I said above with the QS8 mount, the stain color is "perfect to acceptable" depending upon the angle at you look at it. Weird!). There was a large "bar" that ran across the top shelf in front that I replaced with a Maple substitute and I replaced the drawer fronts (again, previously black) with pieces matched to the Axioms' Beech. I had also tried replacing the included feet with castors, but even they added another 2" that I really didn't want so I ended up using Teflon gliders on the bottom. I'm always big on being able to pull something out to rewire!
Again, in the end, I think it was very successful. The black, silver and "faux Beech" finishes present a clean, "matching" look and I was able to duplicate those two replacement pieces in half a day. For maybe $150 total, it works for me!


